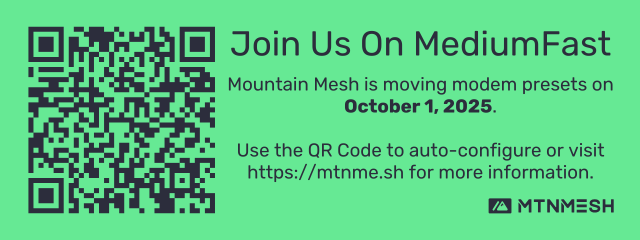
Migration to MediumFast
We flipped our mesh to the MediumFast modem preset effective October 1, 2025.
Warning
If you have a filter on your node, make sure it's compatible with the MediumFast frequency before continuing. LongFast (slot 20) operates at 906.875 MHz. MediumFast (slot 45) operates at 913.125 MHz.
Click the image above to access the auto-configuration URL or scan the QR code using your phone's camera.
Note
This link will set the following settings:
-
MediumFast LoRa modem preset with frequency slot of 45
-
Hop limit to 5
-
MediumFastas primary channel (0) with default PSK ofAQ== -
LongFastas secondary channel (1) with default PSK ofAQ==
This will NOT change your node's network role (Client, Client_Mute, etc.)
Why We Moved Modem Presets
All Meshtastic devices default to LongFast out of the box. That's a great preset for getting a small mesh off the ground, but once you get more than 60 nodes chatting in an area, you start getting message collisions. More collisions means dropped packets, network congestion and decreased performance. Considering that some node DBs have more than 200 nodes and channel usage above 45%, we're well past that threshold for migration.
The good news is that this isn't uncharted territory by any means. There are several meshes that have already flipped modem presets. Meshtastic also posted a post on their blog detailing when and why a mesh should flip presets.
Migrating Your Node to MediumFast
There are multiple ways to migrate your node to MediumFast. The easiest way is to use the QR Code above. If that's not your vibe, there are other methods of migration outlined below.
Back that Node Up
Before you start tinkering, it's ALWAYS a good idea to back your current settings up. Thankfully it's easy to do with the Meshtastic apps or the Meshtastic CLI. Below is a quick way of backing up your node's settings using the CLI:
meshtastic -t {NODE_IP_HERE} --export-config > node_settings.yml
Remember, a backup is usless unless you're able to restore it. To restore your settings, run the following command:
meshtastic -t {NODE_IP_HERE} --configure node_settings.yml
Migrating Options
Loading from a YAML Configuration
If we had to pick, this is our favorite way to migrate settings. We have a condensed YAML configuration file that will only change the specific settings that we tell it to. All you have to do is download the YAML file to your local machine and then and restore the settings.
Here's an example of how to do that:
- Download the YAML file to your local machine or your phone.
- Connect to your node using the Meshtastic CLI or an app of your choice.
- Restore the custom configuration you downloaded in step 1. It will only overwrite the settings provided, so your node names and security keys won't be touched.
The benefit of this migration process is that it actually changes some other settings such as node update intervals that the standard QR code doesn't do. The downside is that it's not as intuitive as scanning an image or clicking a URL.
Using the Meshtastic CLI
This method is pretty straight-forward, for what it's worth. You'll need to install the Meshtastic CLI to accomplish this. You can find the installation instructions here.
You can connect to the node via IP, Bluetooth, or Serial. For this example we'll use an IP-based connection.
meshtastic -t {yourNodeIpHere} --ch-set-url https://meshtastic.org/e/#CgcSAQE6AggNCg0SAQEaCExvbmdGYXN0EhQIARAEOAFAA0gBUB5oAcAGAcgGAQ
Mobile App Manual Migration
Listen, I'm only writing up this section because some of y'all are sadists and like to do things the hard way. You do you, but also why?
To migrate to MediumFast using touch-ops, you'll want to do the following:
-
Navigate to your node's settings and click on
LoRaa. Ensure
Use Modem Presetis set toTrueb. Set the
Modem PresettoMediumFastc. Set your
Hop Limitto5d. Set your
Frequency Slotto45e. Set
Ignore MQTTtoTruef. Set
OK to MQTTtoTrueg. Touch
Saveto commit the changes -
Navigate to the channels setting tab
a. Ensure that your Primary channel (channel 0) has the channel name
MediumFast. If that's not the case, touch the channel and rename it toMediumFast. Spelling matters, so be careful.b. Make sure that your
PSKisAQ==. This is the default PSK for all default channels.c. This is optional, but set
LongFastas your secondary channel with a PSK ofAQ==. This will allow you to receive messages from bridged nodes who are piping messages from theLongFastnodes to the new modem preset.d. Touch
Saveto commit the changes.
See our guide on recommended configurations for additional node settings.
Setting up a LongFast Bridge Network
It's totally possible to create a network bridge between the 2 modem presets. You can have 2 radios on the same local area network (LAN) or even have a single linux box connected to 2 radios at once. Check out this blog post for an example on how to run 2 meshtasticd interfaces at the same time using a docker network.
